30 Day Challenge – Rules and Regulations

Brass Tacks

Careful, they're sharp!

So you’ve decided to join me on my 30 day quest for even better health. Awesome – so what are the rules? Well, let’s get down to brass tacks.

First things first. We’ll be following, for the most part, the whole9 30 day program. It’s currently the best laid out 30 day plan, and a lot of people have had a lot of success with it. Be sure to read through the linked page, as it provides a framework in which everything else will stem from. Continue reading

Advertisement

Paleo Thai Larb

Today for dinner we adapted a recipe from “Glorious One-Pot Meals” called Thai Larb. For those of you that don’t know, Larb is a meal that is considered the national dish of Laos, as well as being a staple in parts of Thailand. I had never heard of this before, but rest assured the paleofication of this meal was simple. It makes an affordable, filling and healthy meal, and for the most part it’s pretty simple to make. So let’s get down to business and take a look at the recipe and instructions.

  • Cooking fat (coconut oil is probably the best option for Thai food) – subbed in for Canola Oil Spray (or as I like to call it, the devil)
  • 1 head of cauliflower, grated – subbed in for 1 cup Jasmine rice
  • 1 lime, zested
  • 1 lemon, zested
  • 1/2 c lime juice
  • 1 tbsp lemon juice
  • 1 tbsp fish sauce
  • 1 tbsp rice vinegar (dunno if this is considered ‘paleo’ or not, but no sleep lost over this)
  • 1.5 tbsp honey – subbed in for brown sugar
  • 1 tsp minced jalapeno
  • 1/8 tsp red pepper flakes
  • 2 scallions (green onions), chopped
  • 1 bell pepper (orange or red)
  • 1/4 c chopped fresh mint
  • 1 pound ground beef
  • 1/4 head of chopped green cabbage
  • 1 c. snow peas

Make this in a cast iron skillet. Grease well with cooking fat.

Add a layer of riced cauliflower, spread evenly.

Add all ingredients except meat, mint, cabbage, and snow peas. Add meat to ensure it ends up crumbled. Add mint.

Arrange clumps of meat mixture over the cauliflower. Do not pack together – mixture should be loose.

Add a thick layer of cabbage and top with snow peas.

Cover and bake for 45 minutes @ 450 degrees. Serve hot.

And it’s some good stuff. Make a lot, because you’ll want to go back for more.

A little rooster sauce adds a nice kick, too.

Enjoy!

Paleo Broccoli and Zucchini Slaw

Unfortunately, I have no pictures of this one, as it’s all. completely. gone. But it is pretty darn easy to make, delicious, and filling.

Step One: Make some paleo mayonaise. You’ll use about half of this for the recipe as dictated below.

Once you’ve done this (easily the ‘hardest’ part of this recipe) the rest is simple. Continue reading

Paleo Chicken and Vegetable Soup

Tonight, we at casa del Primalfringe were contemplating what we were going to have for dinner. We had chicken, vegetables, and spices ready to go. rummaging through the freezer, I found some chicken (or possibly turkey – hard to say) stock we had previously cooked up and frozen. Considering today was about 20 degrees cooler than yesterday, soup seemed like a good choice. With that, we were off to the races.

Continue reading

Feed a cow some corn…

It seems the food production industry knows something about health, wellness, and weight gain that they aren’t telling people looking to lose a few pounds. It’s obvious once you really start to think about it, but it’s been hidden, just out of sight, in the wonderful world of CAFOs. Continue reading

Are you eating enough food?

mmm.... steak

One of the big problems a lot of people have when they first wean themselves off of processed and high-caloric foods and transition to foods that are low calorie but nutritionally dense is understanding exactly how much food you have to be eating. It certainly was a shocker for me. But let’s not kid ourselves – it’s a lot of food. Removing those calorie dense foods from our diet leaves us at a calorie deficit that we have to rectify. And the easiest way to do that is to bring on the fats.

Continue reading

My ChooseMyPlate – Part 1 – Deconstruction of ChooseMyPlate

My MyPlates

Many of you by now have seen the new USDA ChooseMyPlate recommendations, where they eschew the near ubiquitous “Food Pyramid” for something much more nebulous – 4 roughly sized areas on a plate of indeterminate size, complete with another area off to the side to represent dairy. On the plate are the usual suspects – Vegetables, Fruit, Grains, and Protein (not meat, because we have to be sensitive to the people that choose not to eat meat. To do otherwise would be at the very least rude, and we can’t ignore protein completely. So we instead name that section after not the type(s) of food you eat (meat, nuts, dairy, tortured-vegetable-protein byproduct), but instead the macronutrient that the foods replace. Great. Should we do that with the other stuff? Nah, because then we would have the following: Protein, carbohydrate, carbohydrate, carbohydrate, and that would just look funny and a little sad.

Continue reading

First trip foraging in the ‘wilderness’

A home amongst the nettles

Today the family and I loaded up the trusty wagon and headed down to visit some friends and do something that I had never done before – forage for nettles! For those of you that don’t know, nettles are a stinging plant (not everyone is sensitive to them, but be warned) that is commonly found across Europe, Asia, and North America. Many a child has been hit by the stinging needles of the Nettle. The upside to these hurty plants is that they’re also delicious and full of vitamins and minerals that will keep you coming back for more.

About Nettles

Nettles are leafy green shoots which are usually found in areas of heavier rainfall and grow particularly well in areas with a high phosphorus soil content. The leaves range from thin and tender

when young to much thicker when mature. The leaves can reach nine inches in length and five or six in width. The stalks are generally fibrous and tough. Both historically and currently they are being used in textiles and cordage.

The leaves are generally eaten blanched and in conjunction with something else (as blanching tends to compress the leaves into fairly dense blocks of green – think frozen grocery store spinach) and provide a fresh ‘green’ or herbal flavor. The leaves can also be dehydrated and crumbled and used as a tea or decoction, or sprinkled over meat or into sauces as an herb. It is quite versatile.

The nettle is rich in vitamins A and C, and contains the following minerals: iron, potassium, manganese, and calcium. They are also high in protein (for a leafy green vegetable), containing up to 25% by dry weight.

Harvest

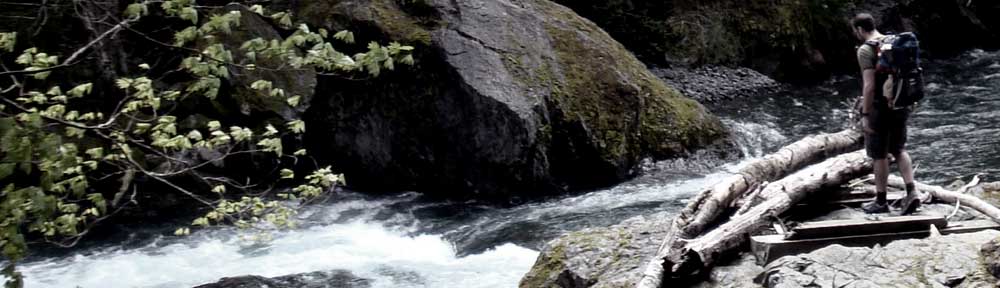
A boy, a man, and a dog go walking in a park...

Harvesting without getting stung can be a challenge. It is recommended (if you don’t know if you are sensitive or not) that when you go you come in the following items: Long pants, long sleeved shirt, shoes, plastic grocery bags, and gloves. The gloves should be leather or latex coated cotton gloves. (Pro Tip: Special care should be made to ensure the back sides of the gloves are coated in latex also. Particularly the fingers.) Additional protection may be garnered by wrapping thin or compromised locations with electrical tape. (Pro Tip: long sleeves with thumb holes might come in handy to protect from the sleeve slipping up and exposing your wrists.) Once you have these items, all you need is a nettle patch to tromp through to look for tasty-looking ones. From there it’s a simple matter of snapping the plant off at the midpoint or so and stuffing it in the sack. Repeat until your sacks are full. Then we get to head home for more adventures! (for more on harvesting stinging nettles, check out learning herbs‘ article on how to harvest without gloves!).

Preparation

Preparation is easy if involved. This is performed in 4 steps.

  1. Soak nettles in cold water to remove bugs, debris, and theoretically stinging (While I did not get stung AFTER we soaked them, I still wore latex gloves to protect myself from any potential stings).
  2. Remove stems and unwanted leaves. Grade the leaves according to size and toughness (larger and tougher leaves are better used for tea).
  3. Transfer soaked nettles into a pot of boiling water. They should stay in the boiling waterfor 10-20 seconds.
  4. Remove from boiling water and proceed to wringing the blanched leaves out and forming a thick and dense puck or ball of nettles.
  5. Package using conventional ziplock bags or a vacuum sealer. If they are vacuum sealed, they can be frozen and kept good for a very long time.
  6. For tea, throw the leaves in a dehydrator (DIY or storebought doesn’t matter) and dry those things out. In a pinch, a low heat oven will work. When they have dried, simply crumble the leaves and enjoy (try pairing with peppermint, chamomile, or lavender to soften the ‘green’ flavor nettle tea has on its own).

And that’s how we did it! It was an excellent day out with friends and family, and we got to get out, explore the nature around us and get back to our primal roots a little bit.

Food is an important part of our lives, and we feel that our kid needs to know that food doesn’t just ‘come from the store’, but rather has its own place in nature, requires real and honest work to procure, and that the experience of gathering food can be just as rewarding as the consumption of the food itself. I feel that foraging and hunting is very important to the primal way of life and once again connecting our lives to the foods which enrich us and allow us to thrive and prosper in a way that oreos, doritos, or any other ‘food’ that ends in ‘os’ would never be able to do.

Medicinal

For more information on nettles, including medicinal effects, check out this link from the Idaho Observer.

References:

http://www.learningherbs.com/nettles.html

http://proliberty.com/observer/20060517.htm

http://en.wikipedia.org/wiki/Urtica_dioica